Setup instructions for
VoIP Phone Fanvil X305
Connecting your Fanvil X305 VoIP Phone
Step by step video instructions on how to connect your Fanvil X305 VoIP Phone.
What you get in your box
Below are the items you will find in the box.

Phone

Handset

Handset cord

Phone stand

Power adapter

Ethernet cable
Comfortable positioning
Your new phone is designed to sit on a flat surface like a coffee or side table. You can tilt it in two different positions as shown in pictures A and B below.
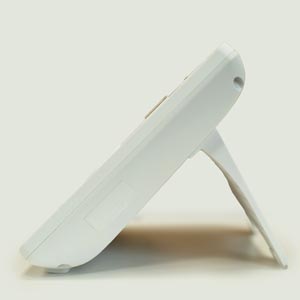
Position A
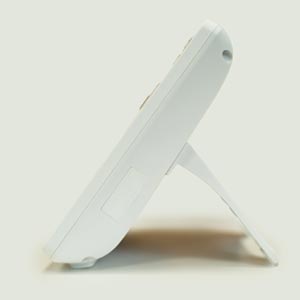
Position B
Connecting your handset
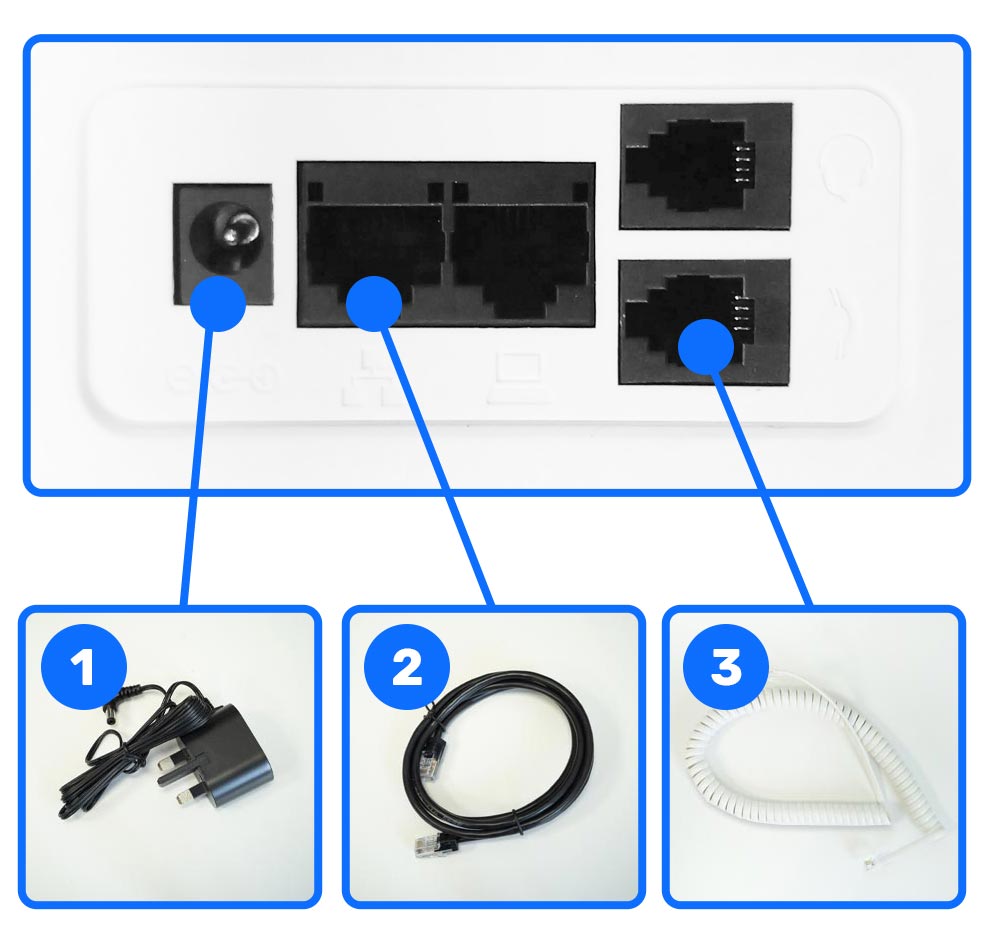
Your new VoIP phone will not be plugged into the BT socket on your wall. Instead, it will be plugged directly into your router. Our step-by-step instructions with pictures show you exactly how to do this.
1 Connect power adapter into the back of the phone and into the wall socket.
2 Connect the ethernet cable to your phone and your internet router.
3 Connect your handset cord to the back of the handset and the back of the phone.
Big buttons & big features
Below you can see what each part of your new phone does. From adding a photo to your quick dial buttons to the big HELP button to alert your Trusted Person.
1 Quick dial keys
2 Menu buttons
3 Numeric keypad
4 Hands-free or loudspeaker on/off
5 Message waiting indicator
6 Help key for Trusted Person assistance (available only with GallGuard and CallGuard+ plans)
7 Redial key
8 Increase or decrease ringer volume

Now your new phone is ready to use!
If you need further help with setting up your new phone, please contact our friendly UK-based team on 0800 112 5000, email hello@phonely.co.uk or use our Chat to us.
